Last Updated on April 15, 2025
Skating on natural ice is so much fun but it’s also very important to do it safely. Swedish lakes and especially the sea can be very tricky. I discussed different types of ice and ice safety last time. Today, we will go thorougly through equipment you need on ice. Luckily, Sweden in general is very good with safety rules and you can see it also in the equipment of any Swedish skater.
Let’s start with the ice safety equipment
Skating is very popular in Sweden and there are many local Swedish skating clubs across the country. If you would like to become a member and join their skating trips you must first buy full ice safety equipment. All of the equipment is recommended to everyone who steps on natural ice. Let’s take a look at it briefly first:
- Ice Skate & Boots – let’s start with the obvious equipment. It would be difficult to skate without them 😉
- Skating Poles – important tool to check the quality and thickness of the ice, also helpful if you have to go against strong wind
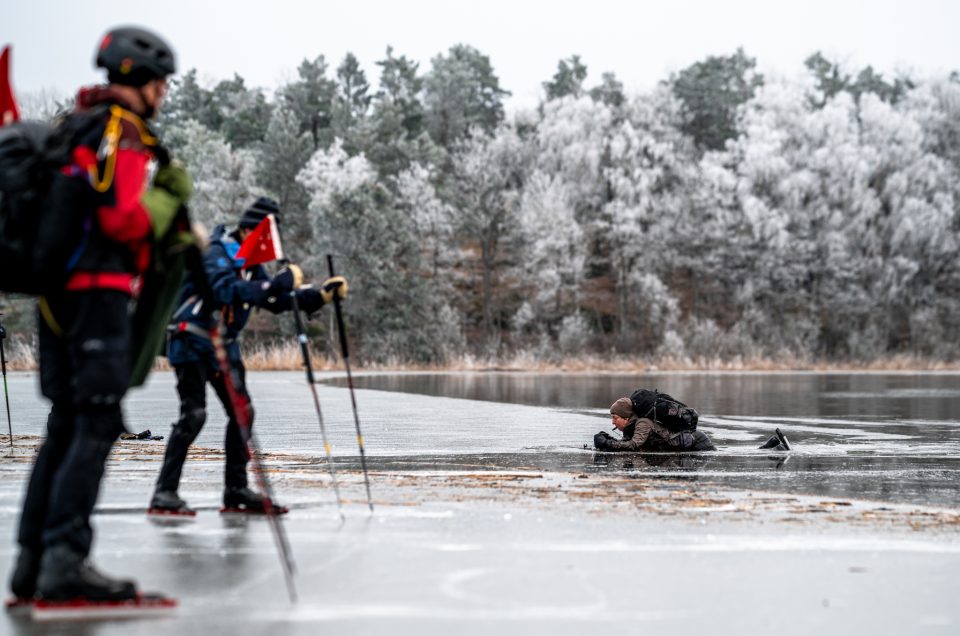
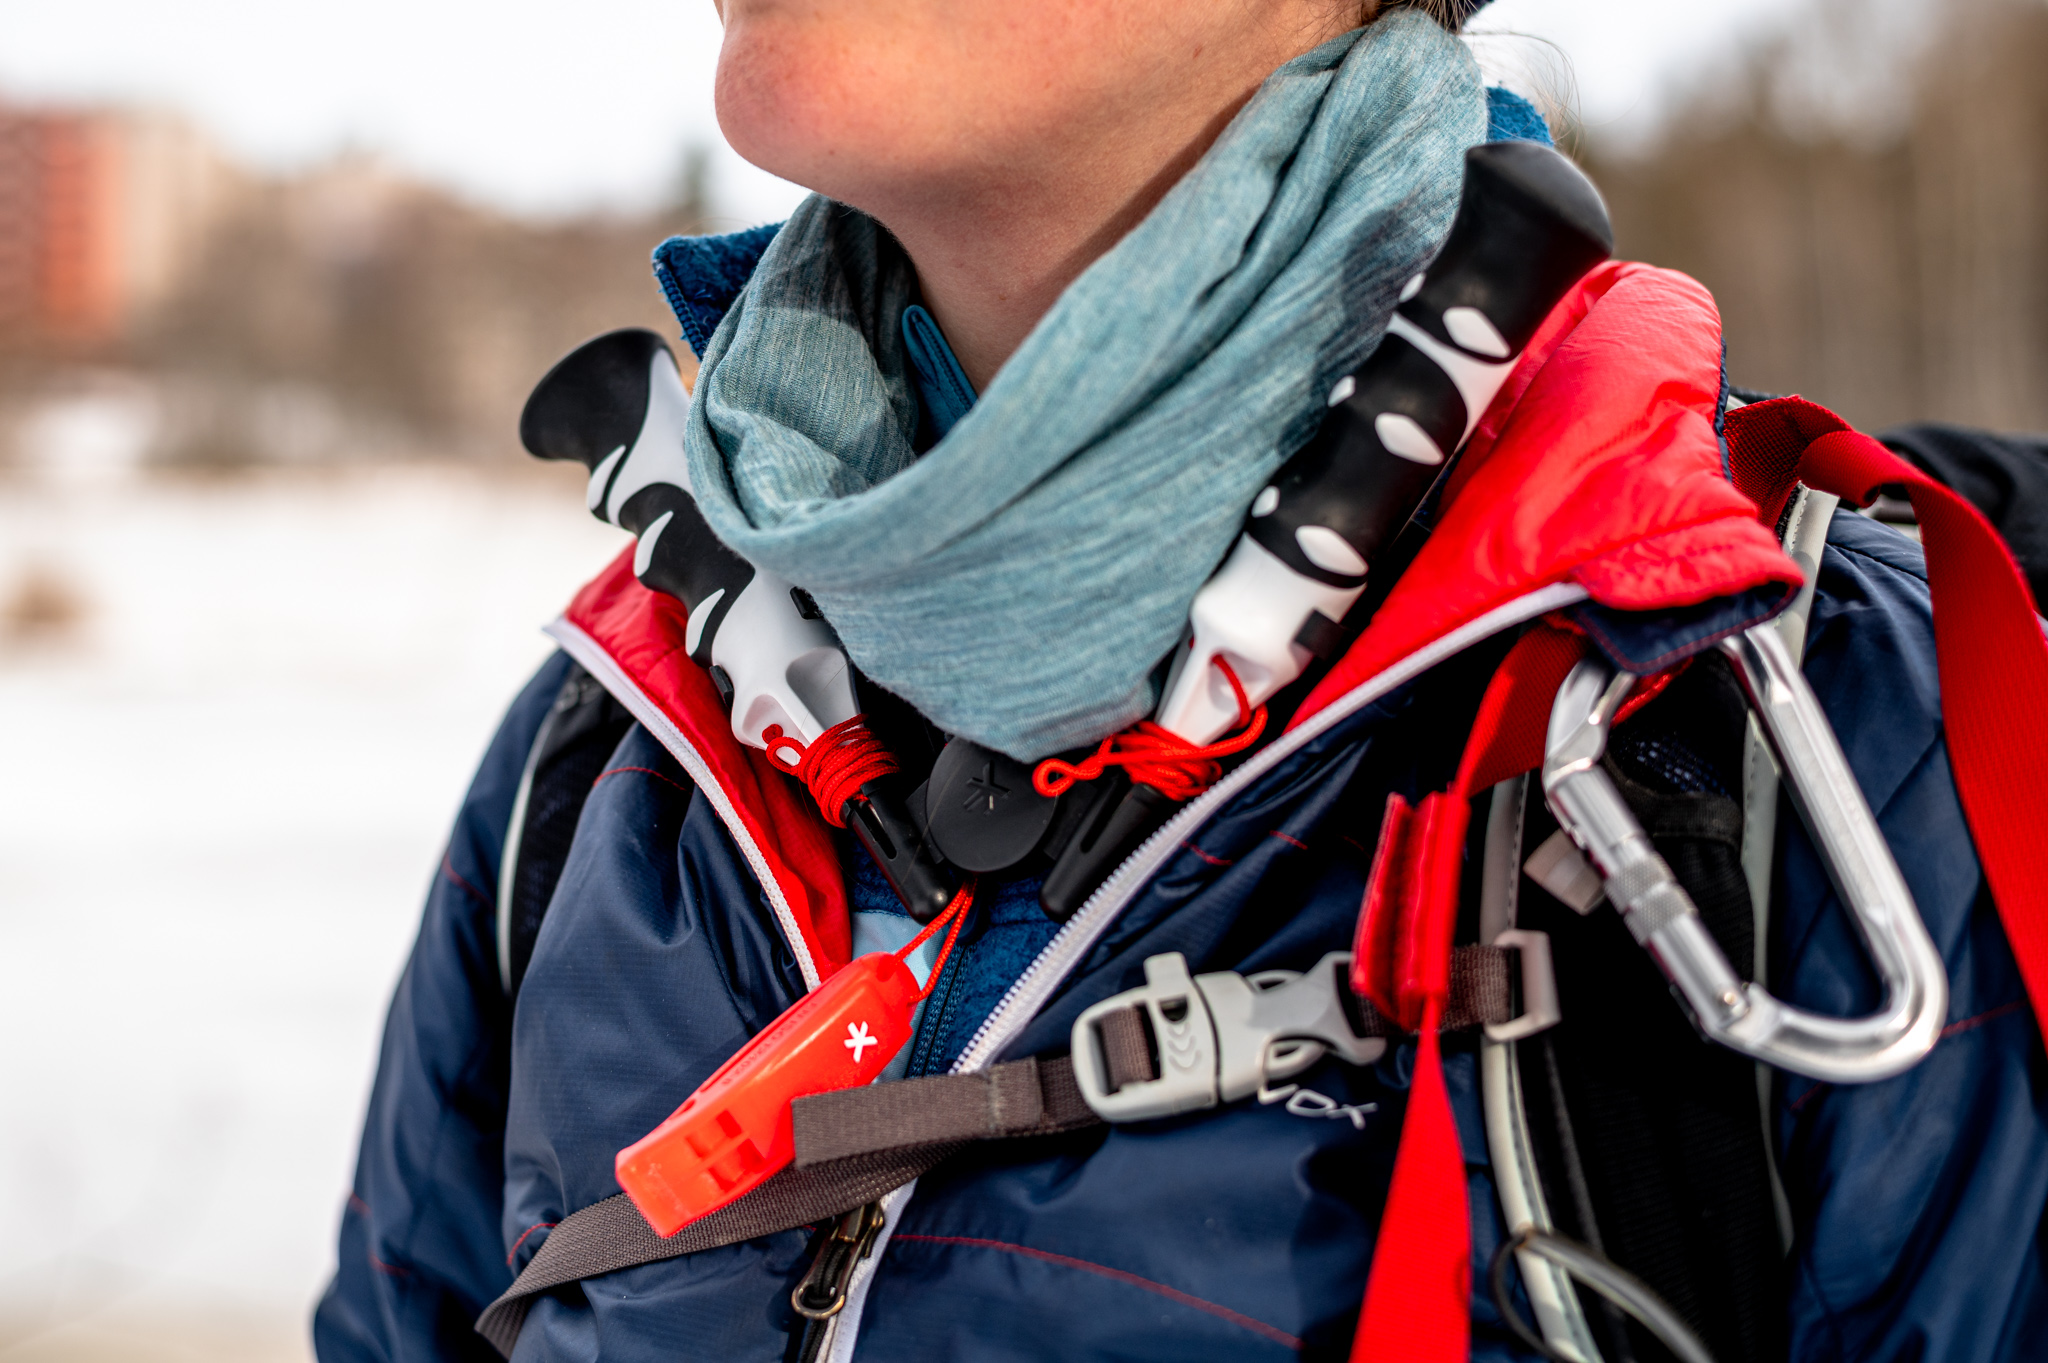
- Ice picks – a necessary tool to get you out of the water in case you fall through the ice
- Whistle – helps you to call help if you are in trouble
- Rescue Lines – will allow your friend(s) to help you get out of the water
- Backpack with extra clothes in waterproof bags
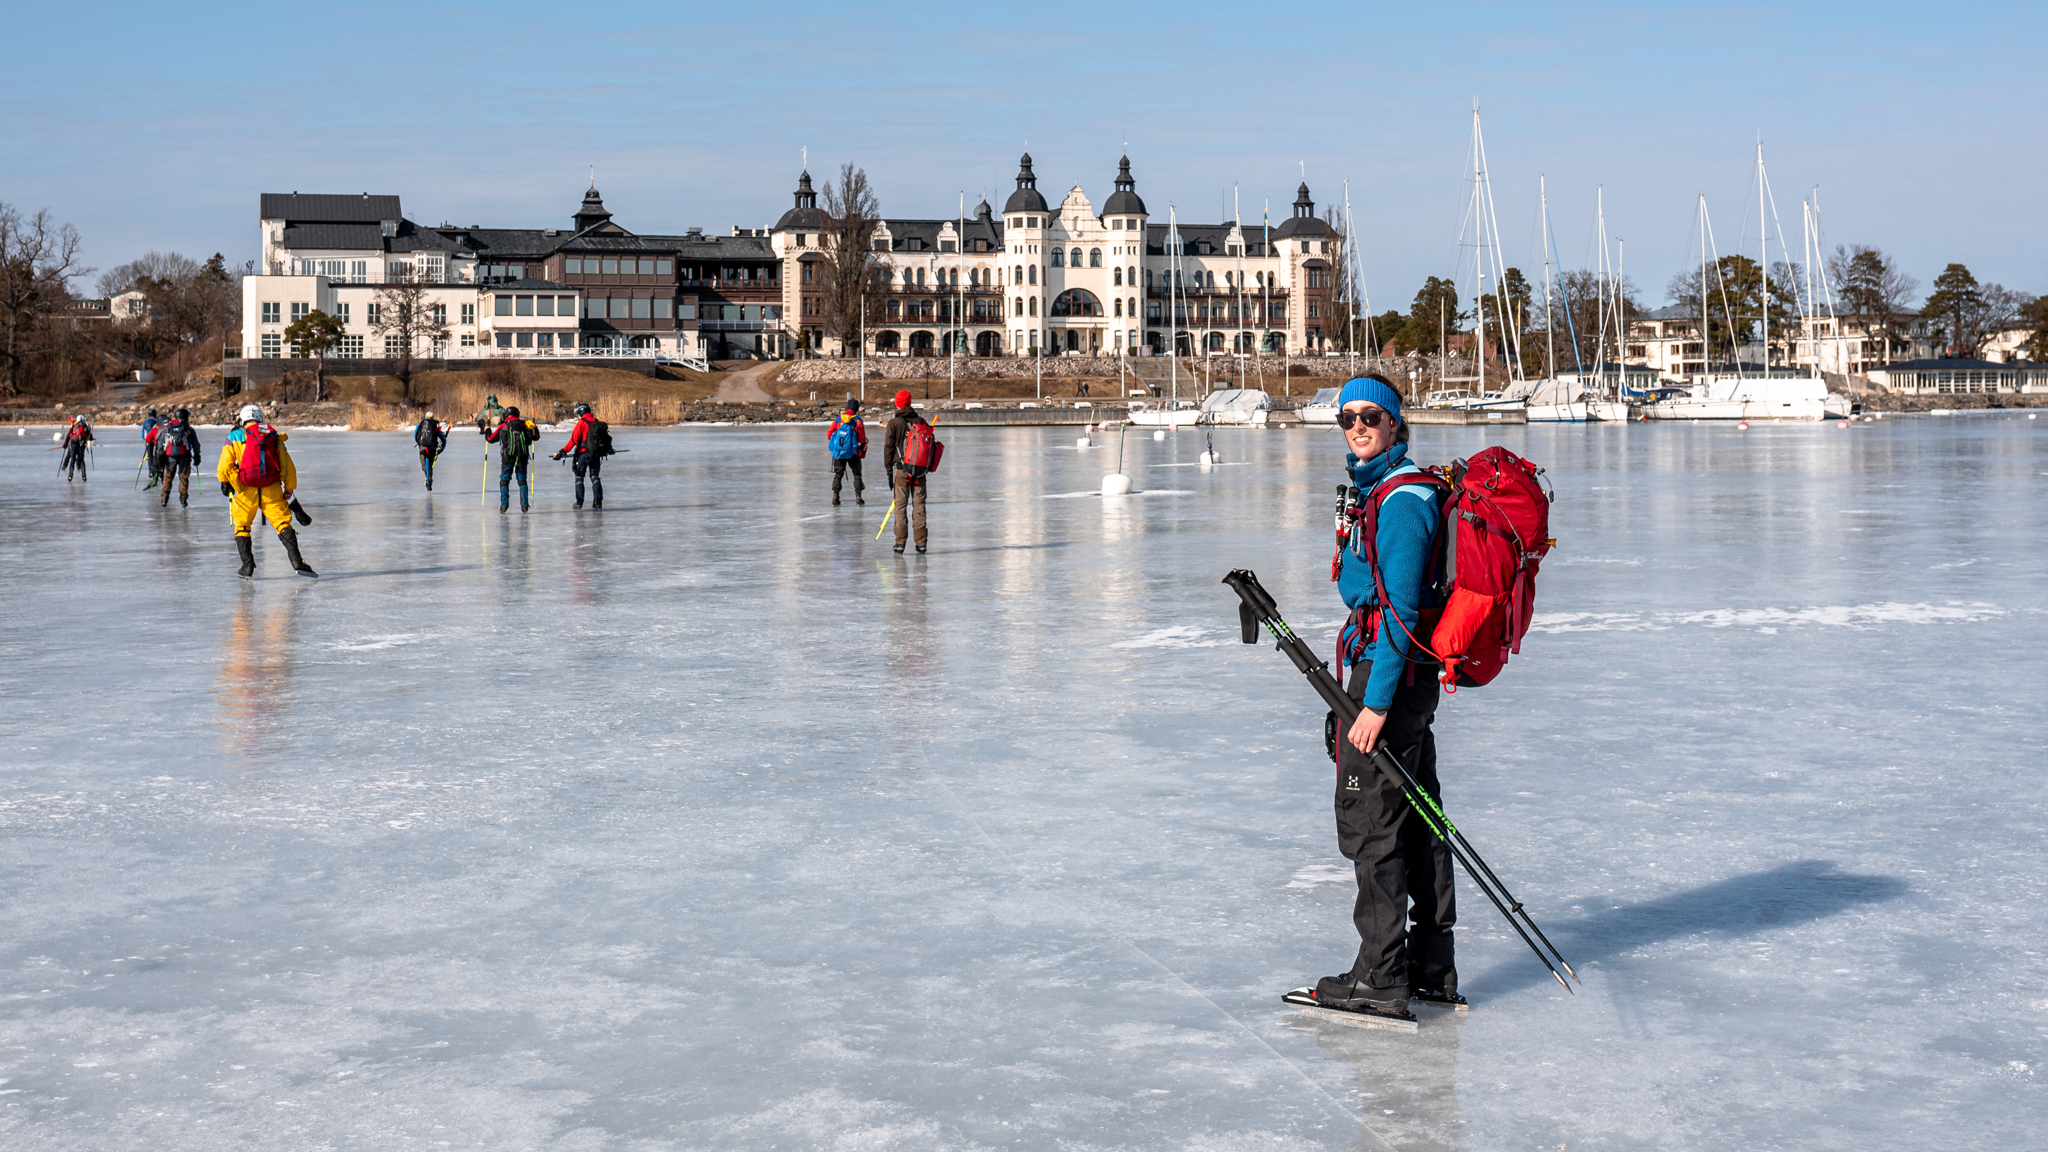
I would never go to unknown ice conditions without the above mentioned equipment either. During the last seven years of skating in the Stockholm area and three years of being a guide I still explore new areas every winter and the right equipment is crucial.
Below you can see all equipment (including my camera gear) which I bring to every skating trip. Besides what you can see in the picture, I also bring medical kit and a waterproof bag with extra clothes in it which I would use in case I fall through. We’ll discuss these items below too.
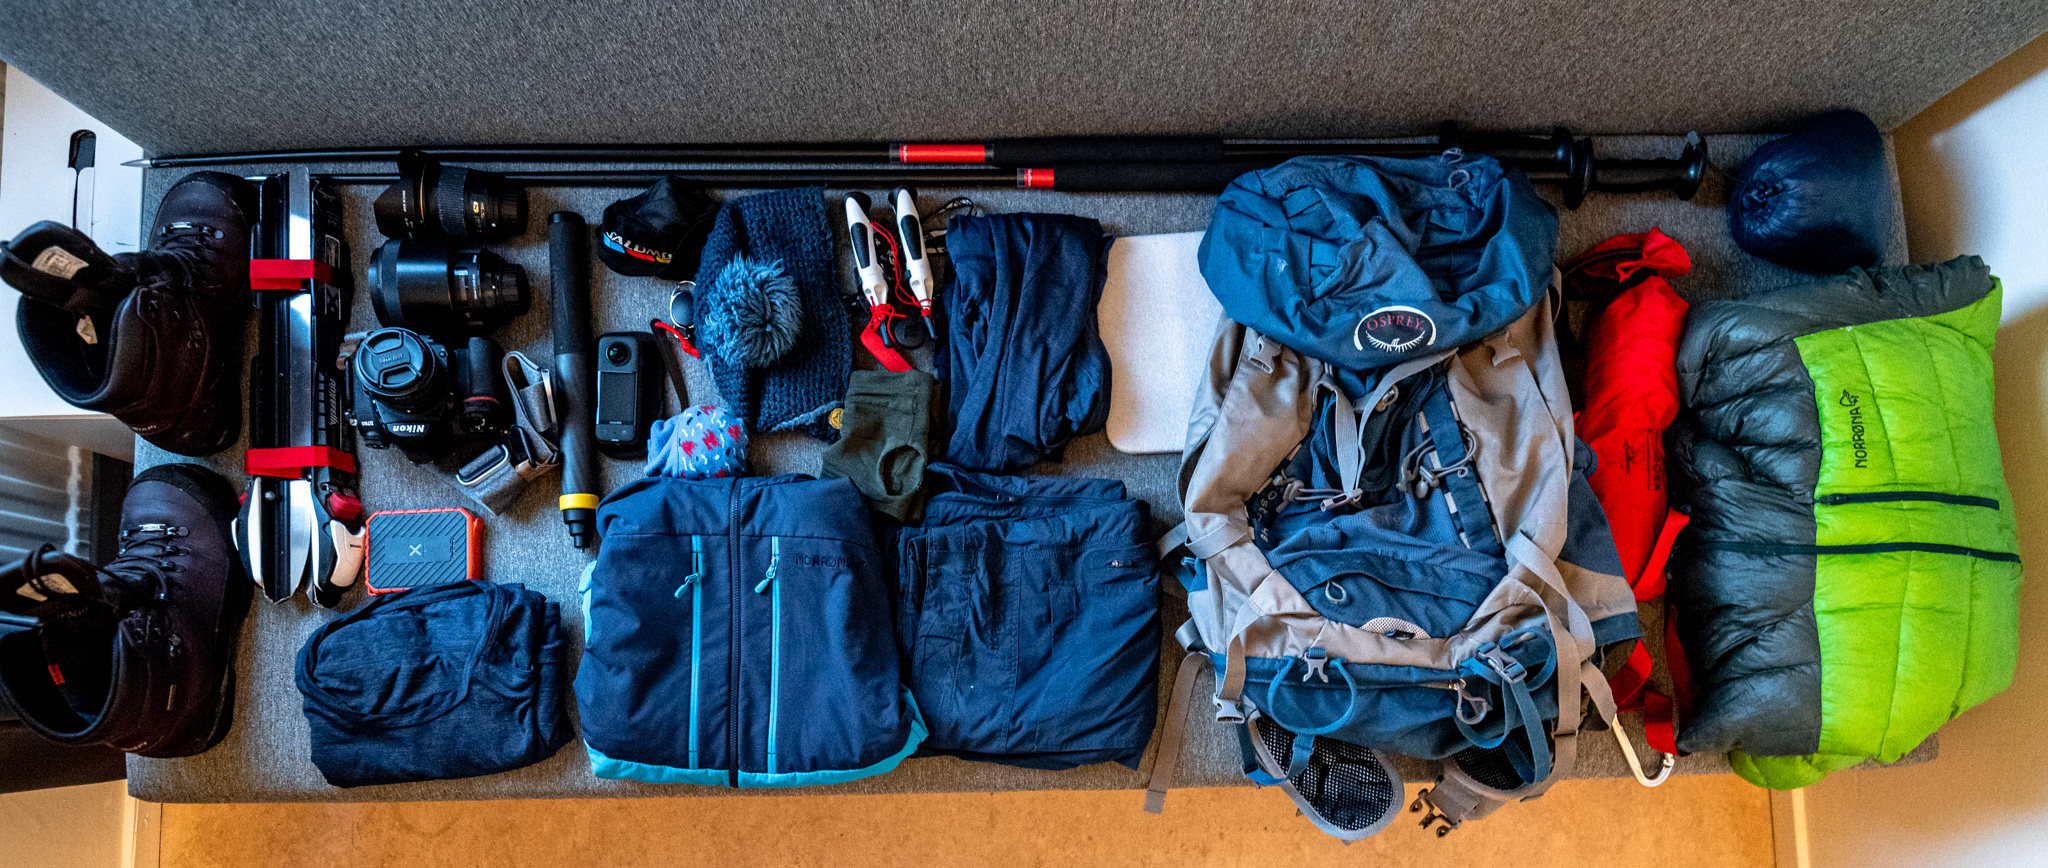
My ice skating equipment list
Let’s take a look at the equipment more in detail now.
Ice Skates and Boots
There are three main skates and binding systems for natural ice skating which you should choose depending on personal preference and skating style. In general, both of the nordic bindings are suitable for Swedish lakes and sea.
- Nordic Bindings – Nordic bindings are a common type of skate binding used for natural ice skating. These are preferable for skating in Sweden over Dutch bindings (see below) because you can easily remove the skate from your boots and walk between lakes or if you have to pass a crack over land. These bindings use a clip mechanism that attaches the skate boot to the skate blade. The clip mechanism provides a secure connection between the boot and the blade while allowing for some flexibility in the ankle. Keep in mind that there are two types of Nordic bindings commonly used for natural ice skating. They are called the NNN (New Nordic Norm) binding and the SNS (Salomon Nordic System) binding. Both the boots and bindings must match. I have both of these pakcages and found out that SNS mechanism is slightly better for skating experience but the boots are less comfy for walking. If you would like to make trips with some walking in between, I would rather recommend the NNN binding and boots because they are more comfortable.
- Dutch Skates– Dutch skates are different. Their blades are directly connected to the boots. These skates are much faster but they are not ideal for worse quality ice and you can’t just remove the boots and walk in between lakes. Dutch skates are therefore more suitable only for lakes with perfect ice or stadiums.
Would you like to buy some skates and boots too? There are many brands to choose from. I myself have skates from Lundhags and Skyllermarks and they are both amazing. Regarding boots, I have Salomon cross country skiing shoes for SNS binding and Crispi for NNN binding.
Skating Poles
Skating poles for testing ice thickness are an important safety tool for skaters, especially when skating on ice where conditions can vary widely. By using these poles, skaters can ensure that they are skating on safe, stable ice and avoid the dangers of falling through thin or unstable ice. They also work very well to pass parts of ice where the skating conditions are worse (for instance when there is snow or double ice) and help when skating against wind.
There are several brands offering skating poles and they differ in weight and the ability to go through ice. It’s important to know your own pole and “calibrate it” to test the thickness. I know for intsance that if I make a hard hit with my Skyllemarks pole and it goes through, I should turn around 🙂
Ice picks and a whistle
Safety ice picks are a specialized tool used for ice skating that are designed to help skaters pull themselves out of the water in case they fall through the ice. They are also sometimes called ice claws, ice awls, or ice gripers. Similarly to other equipment, there are also many different kinds on the market. I just recommend not to buy the cheapest ones. As this tool can save your life, rather spend a little bit more money to make sure your ice picks work well when you need them. Don’t forget to buy those which come with a whistle so you can call help in case of accident. Remember the last scenes of Titanic 😉
Rescue line
Rescue lines are an important tool for ice safety, as they can help to quickly and safely rescue someone who has fallen through the ice. They should be carried by all people who are venturing onto natural ice to be able to help each other. Every rescue line should also have a carabiner which you attach to a stripe at your back pack during the rescue. I am very happy with this rescue equipment for example. It worked very well during my test fall through.
Backpack with a waterproof bag
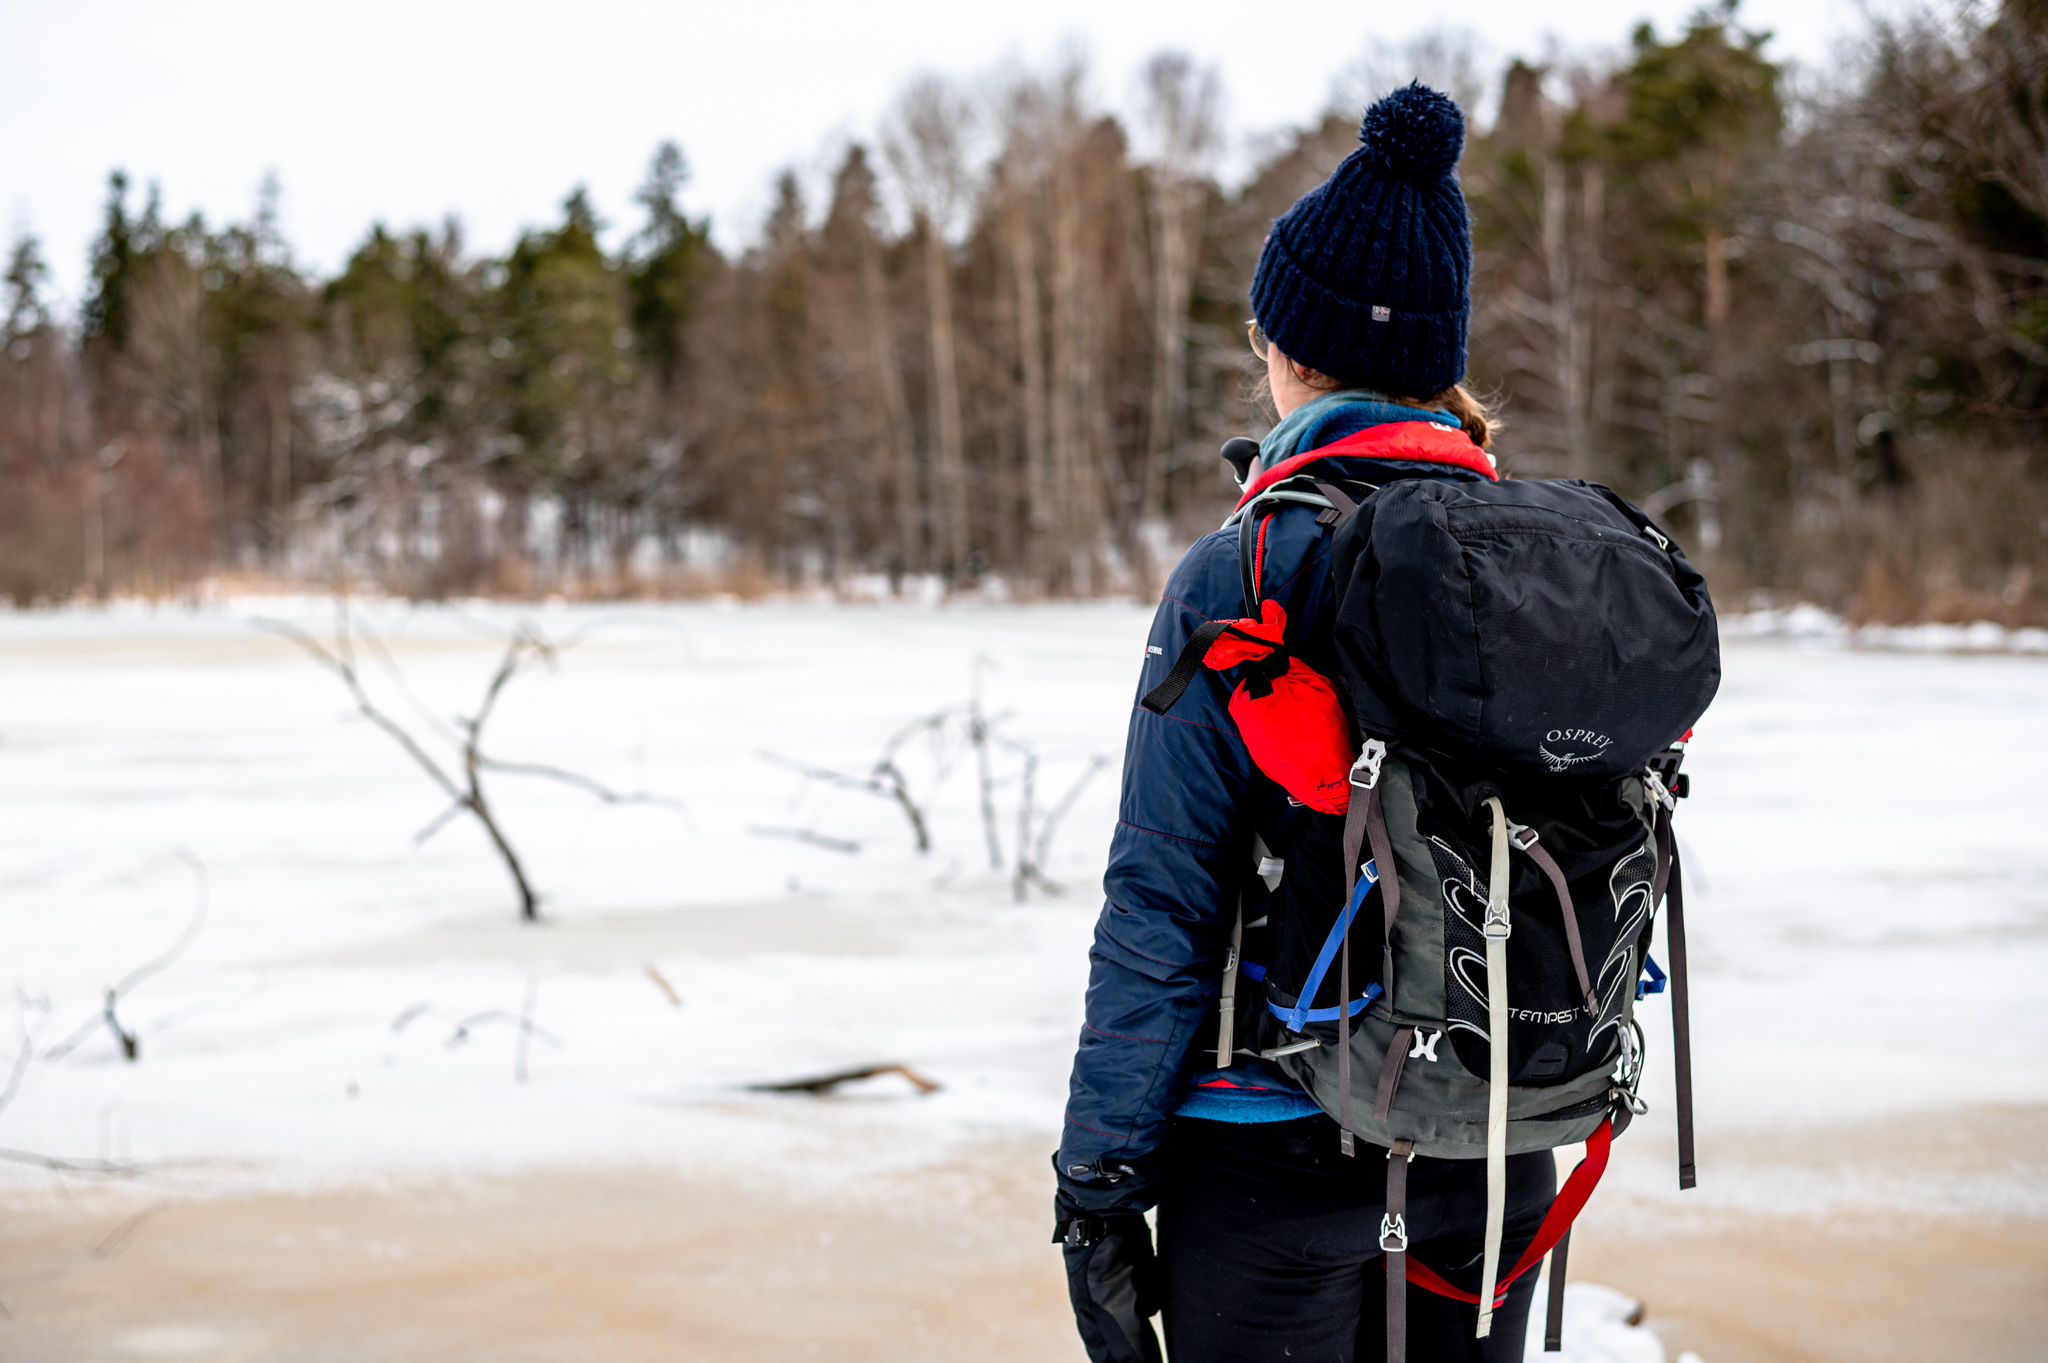
Every skater should have a backpack with a waterproof bag inside full of extra clothes. It doesn’t only help to carry essential extra clothes which you would use to change after ending up in water but it also serves as a life vest. To make sure your backpack works best as life jacket, you have to have an extra stripe which connects your backpack to the stripe in the front of your body (see the red stripe on the picture below). It makes sure that the backpack will stay attached to your body. Without this stripe, the backpack would go up in the water and it wouldput your head down in the water.
I’m using a classic hiking backpack (30l) for skating with the additional strips. If you want you can also buy a special ice skating backpack where the stripes are already included.
Clothes and extra clothes in the waterproof bag
When going to skate, it’s good to use layering system for your clothing. I always have the first two layers as described below and then I sometimes add additional layer in case it rains/snows or if it’s very cold. During skating, you can then easily adjust the layer based on how warm you feel or how the weather changes.
- Base Layer: Start with a lightweight and breathable base layer that will wick moisture away from your body. This layer should be made of materials such as polyester or merino wool, and should fit snugly against your skin. I myself prefer merino wool as it doesn’t smell after sport.
- Insulating Layer: The next layer should provide insulation to keep you warm. This layer should be made of materials such as fleece, and should be loose enough to allow for ease of movement.
- Outer Layer: The outer layer should protect you from wind, cold and/or moisture. This layer should be made of materials such as Gore-Tex or other waterproof and breathable fabrics (in case of wet weather) or a down jacket in case it’s very cold.
In addition to the layers above, you should also wear a warm hat, gloves or mittens, and a scarf or neck warmer to protect your neck and face from the cold.
All above I carry once more in the waterproof bag. Don’t forget to add there a small towel to dry yourself. I also recommend to bring sealskinz socks which will keep your feet dry even in wet shoes. Another tip is to have a rain jacket in the waterproof bag to keep your back warm after you put on wet backpack.
Don’t forget to think about breaks. It gets cold pretty quickly once you stop moving. For these moments I bring with me a thicker down jackets and down pants. Thanks to them I am never cold during lunch/snack times.
Extra tips
All the above mentioned pieces of equipment are necessary on ice but I have some more tips which can make your experience even better.
- Ice measurement: Skyllemark sells great measuring tools for ice thickness. They are small and fit nicely in a pocket. I use them when I want to know how thick the ice is.
- Powerbank: As I am using offline maps on my phone while on ice skating trips, I also always bring a powerbank to make sure I ahve enough battry for the whole day trip
- A torch: You never know what can happen on your trip. To make sure I also see in darkness, I always bring a torch
- A camera: Don’t forget to document your trip. A smart phone is great but if you want special and unique pictures, I recommend also a 360 camera. I myself bring even a DSLR camera but it’s pretty bulky for skating.
Don’t go on ice alone
Now, the ice skating packing list is ready. I also have to add that it’s necessary to have a skating partner. In case of an accident it is important to have someone who could help out. That’s why I always go on a skating trip in a company.
Where to buy ice skating equipment in Stockholm?
If you would like to buy your own equipment I recommend Alewalds store in Stockholm. There you can get the best advice on winter equipment in Stockholm. If you would like to test the equipment first you can book a trip with the company I work. Take a look for more information here.
Disclosure: Please note that some of the links above may be affiliate links, and I earn a small commission at no additional cost to you, if you make a purchase. I recommend only products and services of companies I use and the income goes to keeping the website running.
